2011 MINI Cooper Oil Filter Housing Gasket Leak Repair
Quick Summary
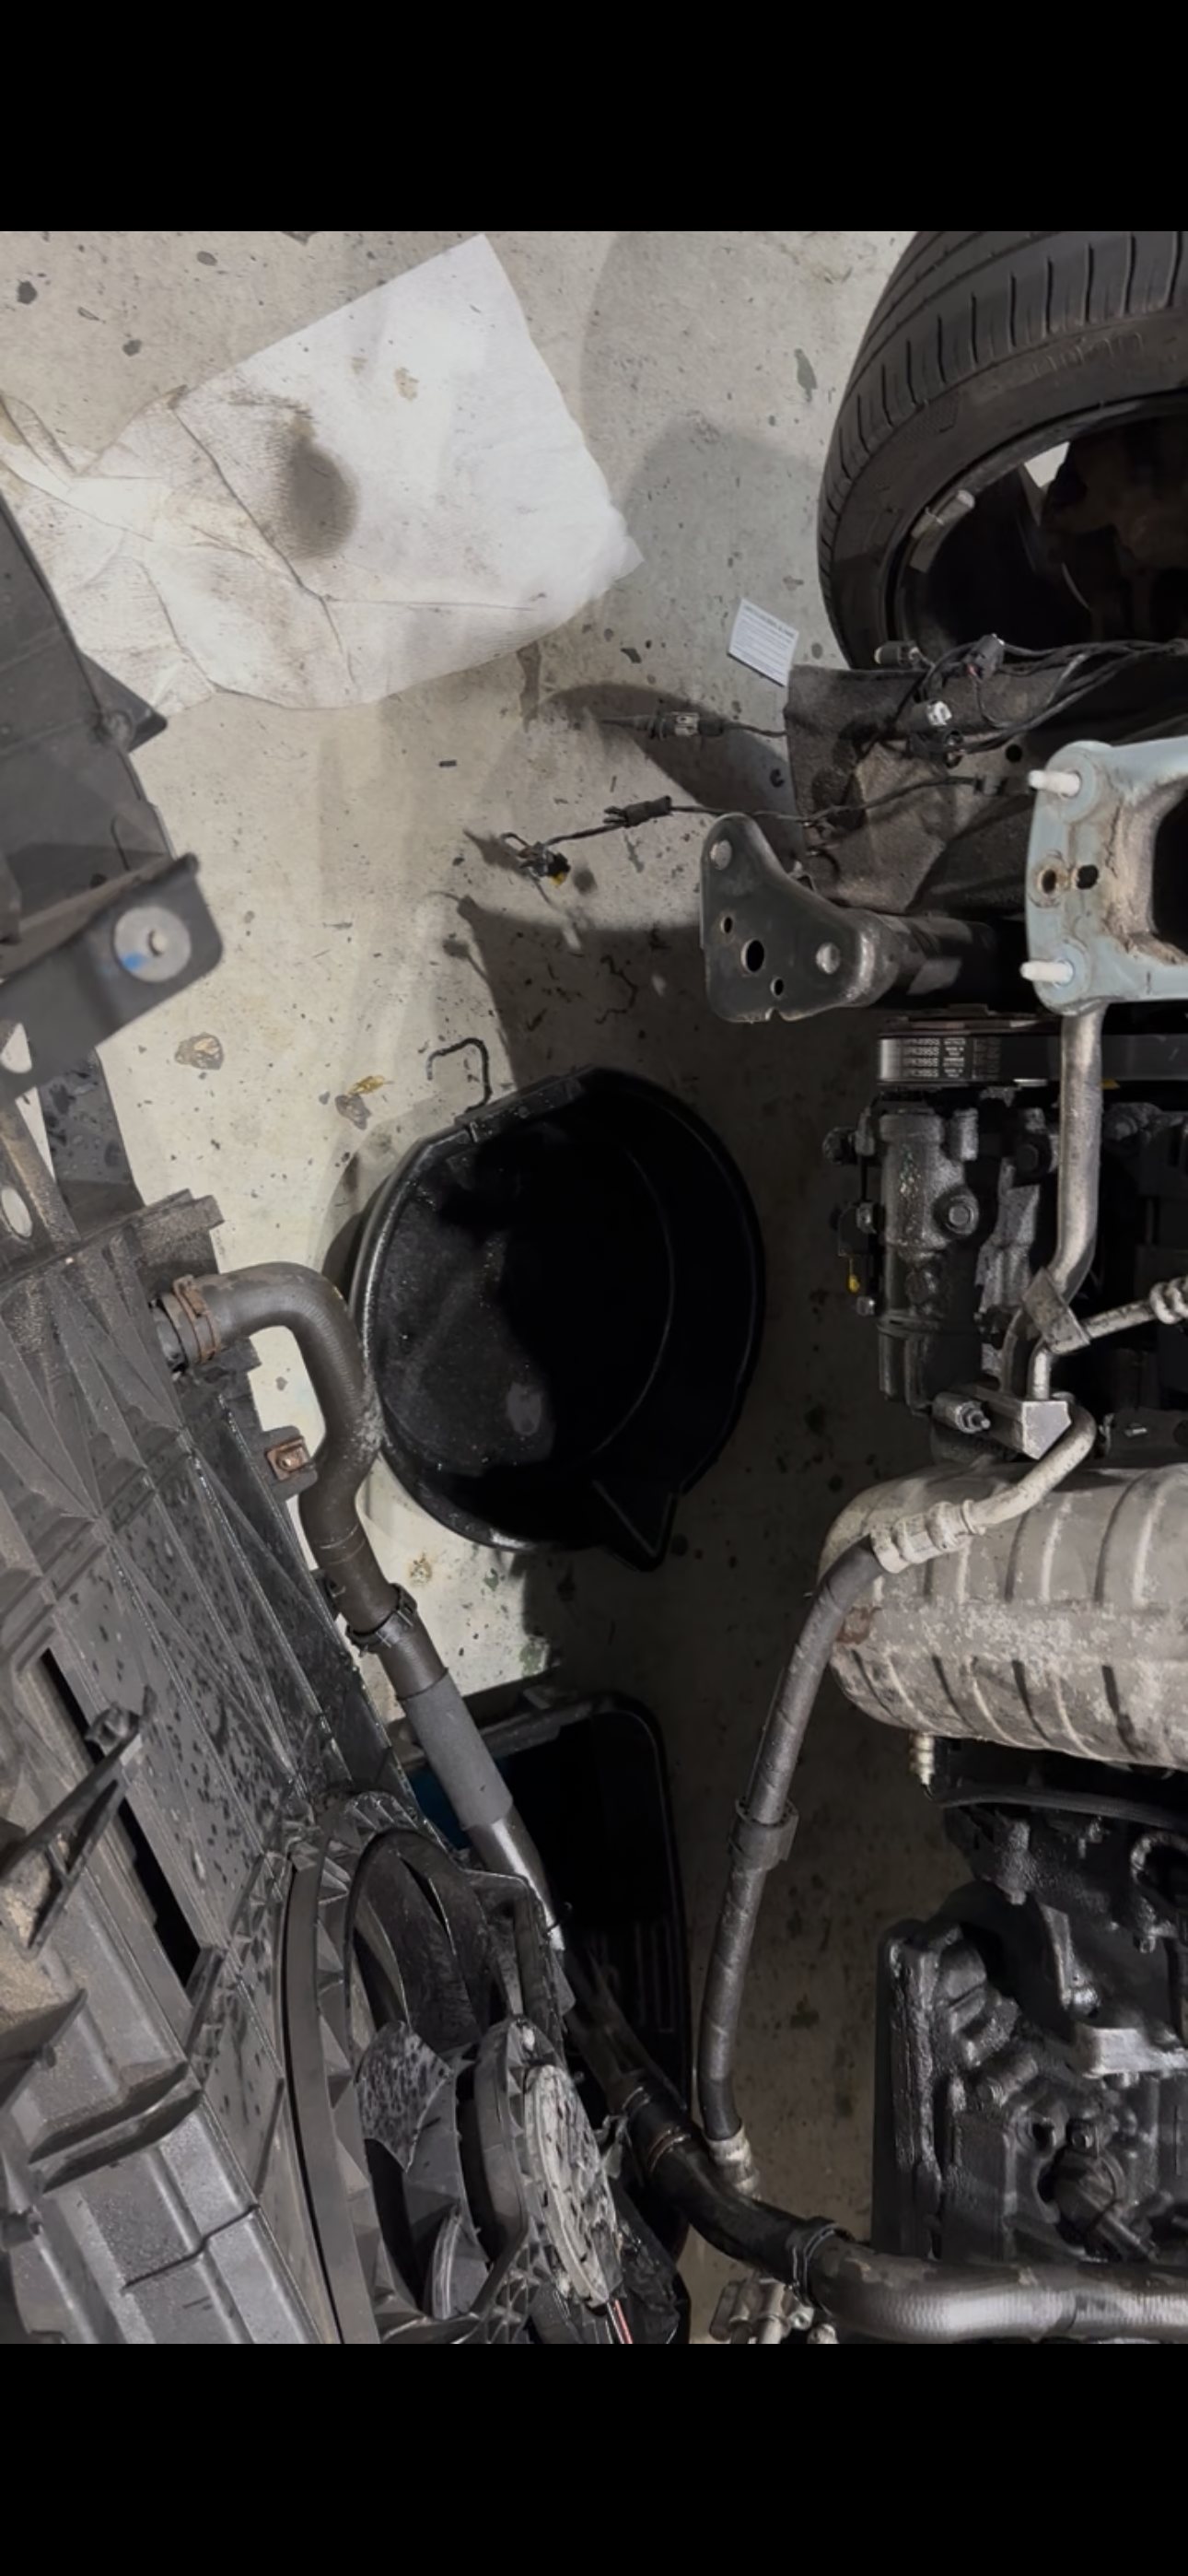
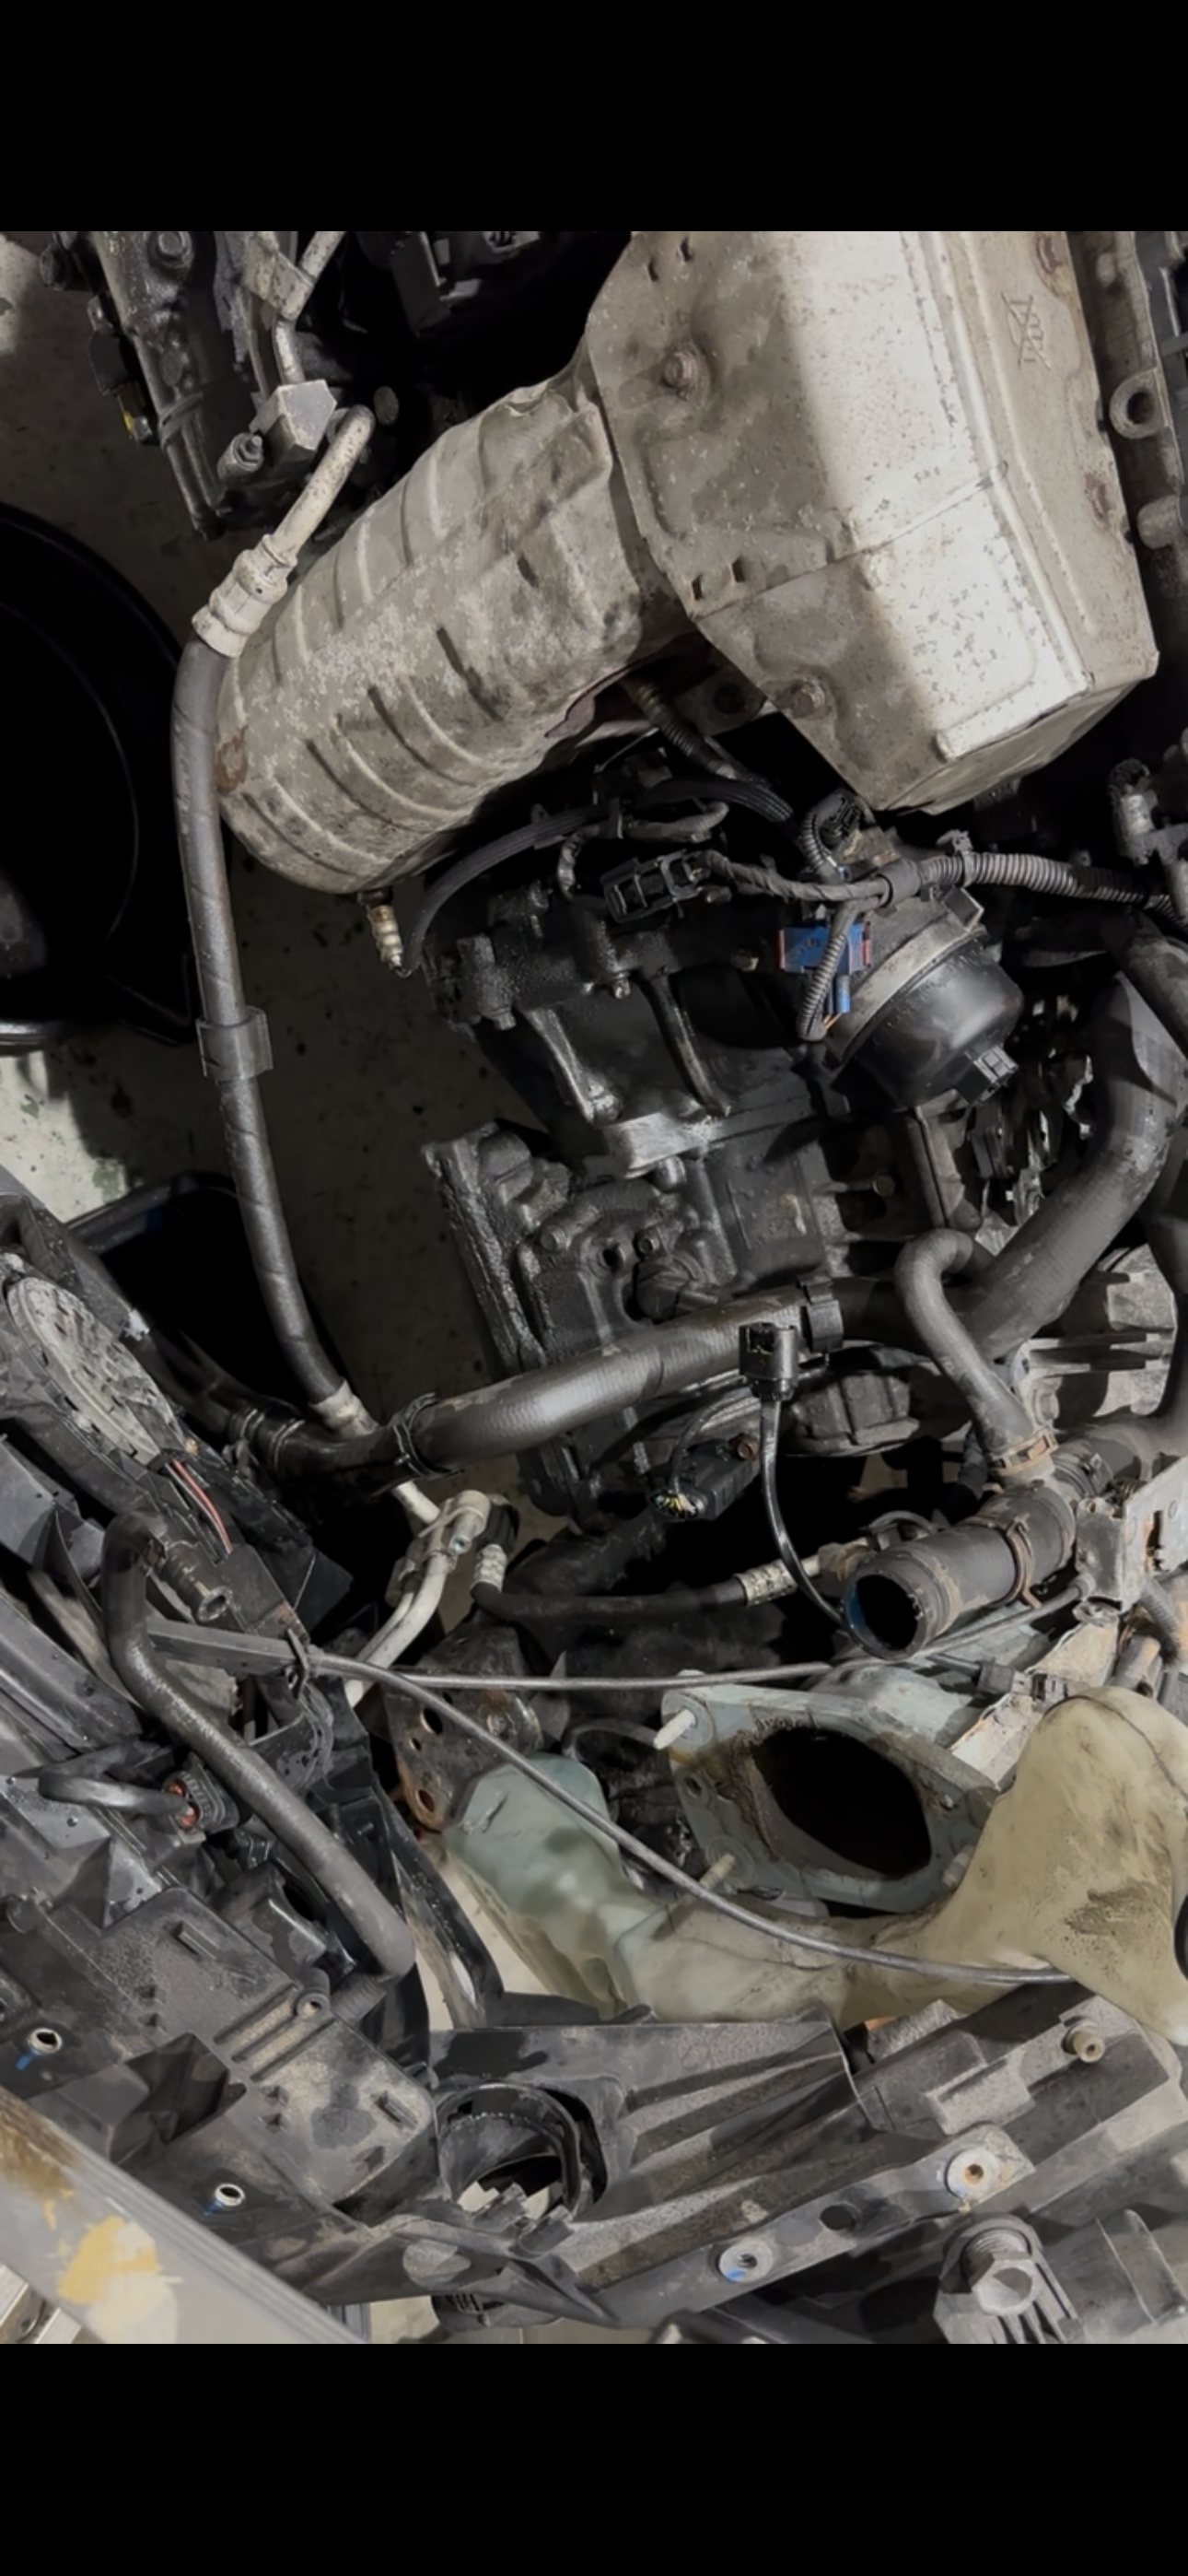
The oil leak at the oil filter housing on this 2011 MINI Cooper Base was found during an earlier inspection and reported to the owner, who then sourced the parts and asked to schedule the repair. The gasket itself is inexpensive. The labour is not: the housing lives at the front of the engine behind the bumper and the cooling pack, and it seals both oil and coolant. The front bumper comes off so the sealing surface can actually be reached, cleaned and confirmed clean before the new gasket goes on. Engine oil and filter are replaced as part of the job, coolant is replaced because the housing is a coolant joint, and the cooling system is vacuum filled so no air is left in it. The job is quoted at eight hours to leave room for whatever the teardown turns up. The photographs of the car with its bumper off are the clearest explanation a customer can get for why a small gasket is not a small bill.
- Vehicle
- 2011 MINI Cooper (R56, N16 1.6L)
- Difficulty
- ★★★★☆
- Repair Time
- 8 hours
- Outcome
- Oil filter housing gasket replaced with the front bumper removed so the sealing surface could be verified clean, with oil, filter and coolant renewed and the cooling system vacuum filled
Vehicle Information
| Year | 2011 |
|---|---|
| Model | Cooper |
| Chassis | R56 |
| Engine | N16 1.6L |
| Transmission | Not documented |
| Mileage | Not documented |
Repair Timeline
- Previous inspection Diagnosis An earlier inspection of the vehicle found an oil leak at the oil filter housing. The finding was reported to the owner at that time rather than repaired on the spot.
- Parts sourcing History The owner sourced the parts for the job against the 2011 Cooper Base application - oil filter housing gasket, oil filter, engine oil and blue European coolant - and confirmed when they were in hand.
- Scheduling Complaint The owner asked when the oil filter housing gasket work could be scheduled and what parts to bring. Weekday-evening and Friday-afternoon options were discussed around the owner's office hours and a weekend shift, including a ride home while the car stayed at the shop.
- Teardown Repair The front bumper was removed and the cooling pack moved out of the way to open up the front of the engine, so the housing could be removed and the sealing surface reached and verified.
- Repair Repair Oil filter housing gasket replaced onto a cleaned sealing surface, with engine oil, oil filter and coolant renewed as part of the same job.
- Refill Verification The cooling system was vacuum filled rather than gravity filled, so no air was left trapped in the system, and the repair area was checked for leaks.
Customer Complaint
The oil leak at the oil filter housing was not the owner's original reason for visiting. It was found during a previous inspection of the car and reported to them then. The owner came back later asking when the oil filter housing gasket work could be scheduled and which parts they should get, then sourced the parts themselves against the 2011 Cooper Base application: the oil filter housing gasket, an oil filter, engine oil and blue European coolant. Scheduling was worked around the owner's office hours and a weekend shift, with a Friday afternoon drop-off and a ride home offered so the car could stay at the shop.
Symptoms
- Oil leak at the oil filter housing, identified during a prior inspection rather than reported by the owner
- Oil residue and staining visible at the front of the engine around the housing area
- No driveability complaint associated with the leak
- Coolant loss potential at the same housing, since the joint carries both oil and coolant
Diagnostic Process
The leak was already located before the repair was scheduled. This was not a hunt for the source of an oil loss. A previous inspection identified the oil filter housing as the leak point and the owner was told about it at that time. What the appointment needed was a plan and the parts, not further diagnosis.
Establish what the job really includes before quoting it. The housing gasket is one small part, but the housing is a combined oil and coolant joint at the front of the engine. That means the oil and filter come out anyway, coolant is lost when the housing is removed, and the cooling system has to be properly refilled afterwards. The parts list given to the owner reflected the whole job rather than the gasket alone: housing gasket, oil filter, oil and blue European coolant.
Decide the access strategy honestly. The repair can be attempted with the front bumper in place. The problem is that access alone is not the goal; a verified clean sealing surface is. With the bumper on there is no way to see and reach the whole surface well enough to be sure of it. Removing the bumper and moving the cooling pack forward is what turns "the gasket was replaced" into "the gasket was replaced onto a surface I know was clean." That decision is the main reason the labour estimate is what it is.
Use the teardown to identify what should be replaced while it is apart. Once the front of the engine is open, several nearby components cost almost nothing in additional labour and full labour if done separately later: the coolant hoses running to the oil filter housing, the turbo oil feed and return lines on turbocharged cars, and the lower oxygen sensor. Recommending these during this job is not upselling, it is avoiding paying for the same access twice.
Quote for the job that might happen, not the best case. Eight hours is the figure given to the customer. Front-end plastics, clips and fasteners on a car of this age do not always come apart cleanly, and a hose or line that should not go back on can appear mid-job. The estimate is built to absorb that instead of forcing a rushed reassembly.
Repair Performed
- Removed the front bumper and moved the cooling pack clear to expose the front of the engine
- Removed the oil filter housing to reach the leaking gasket joint
- Cleaned the gasket sealing surface and confirmed it was clean before assembly
- Installed a new, good-quality oil filter housing gasket
- Replaced the engine oil filter
- Replaced the engine oil
- Replaced the engine coolant lost when the housing was opened
- Vacuum filled the cooling system rather than gravity filling it
- Inspected the coolant hoses at the oil filter housing while access was open and recommended replacing them during this job
- Reassembled the cooling pack and front bumper and checked the repair area
Coolant hose replacement at the housing, turbo oil feed and return lines on turbocharged cars, and lower oxygen sensor replacement are recommendations attached to this job because of the access it creates. This car is the naturally aspirated Base model, so the turbo oil lines do not apply to it.
Parts Used
- Oil Filter Housing Gasket Replacement
- Engine Oil Filter Replacement
- Engine Oil Replacement
- Engine Coolant Replacement
Verification
- Gasket sealing surface visually confirmed clean before the new gasket was installed
- Cooling system vacuum filled, so no trapped air was left in the system
- Repair area checked for oil and coolant seepage after assembly
- Oil and filter renewed as part of the same repair rather than left on the old service interval
- Front bumper and cooling pack refitted and the front of the car reassembled
Technician Notes
Customers see a gasket that costs less than a tank of fuel and reasonably ask why the bill is what it is. The answer is in the two photographs. The car is on the lift with its bumper off and the cooling pack pulled away from the front of the engine, with a drain pan underneath. None of that is billed because the gasket is difficult. It is billed because reaching the joint properly requires dismantling the front of the car.
The bumper is the argument I have most often. It is possible to get at the housing without removing it, and that is how the job is often sold as a shorter operation. But cleaning a sealing surface you cannot fully see is guesswork, and old gasket material or oil film left behind is exactly what makes a repaired housing leak again in a few months. I remove the bumper because it is the only way I can guarantee the surface is clean. If the gasket is going to be done once, it should be done in a way that does not need doing twice.
Gasket quality matters just as much as surface preparation. This is not the place to fit the cheapest part on the shelf. The joint sees engine oil, coolant and heat cycling, and a marginal gasket will fail again after all of that labour has already been paid for. The cost difference between a poor gasket and a good one is trivial next to the eight hours around it.
The recommendations attached to this job all come from the same logic. The coolant hoses to the oil filter housing are already exposed. The lower oxygen sensor is far easier to reach now than it will ever be with the car assembled, and doing it here removes almost all of its labour cost. On a turbocharged car the turbo oil feed and return lines are in the same category. Anything in this area that is aged, marginal or already on a future list belongs in this repair.
Vacuum filling the cooling system is the last step that decides whether the job feels finished to the customer. Air left in the system after opening a coolant joint produces odd temperature behaviour and weak heat, and the owner experiences that as a new problem caused by the repair. Pulling the system down before refilling removes that outcome.
Lessons Learned
- Visible oil near the oil filter housing is not proof the housing gasket is leaking. Clean the area, run the engine, and find the first point that becomes wet before ordering parts.
- A cheap part does not mean a cheap job. Price the access, not the gasket.
- Remove the front bumper. A sealing surface you cannot fully see is a surface you cannot claim is clean.
- Surface preparation is the repair. Old gasket material or an oil film left behind is the most likely reason a replaced housing gasket leaks again.
- Fit a quality gasket. Saving a few dollars on the one part that has to survive oil, coolant and heat cycling is the worst possible place to economise on this job.
- Replace the coolant hoses at the oil filter housing while it is apart. The parts are minor and the access has already been paid for.
- On turbocharged cars, do the turbo oil feed and return lines during this repair for the same reason.
- The lower oxygen sensor is worth doing here. It is easier to reach with the front end open and it saves the customer a second labour charge later.
- Treat the oil, filter and coolant as part of the repair, not as add-ons. The housing is both an oil and a coolant joint.
- Vacuum fill the cooling system. Trapped air after a coolant-side repair shows up as a new complaint.
- Quote eight hours. The estimate should tolerate a brittle clip or a hose that should not go back on without forcing shortcuts.
- Photographs of the teardown explain a labour estimate better than any invoice line ever will.
Final Outcome
The 2011 Cooper Base left with the oil filter housing gasket replaced onto a sealing surface that had been reached, cleaned and confirmed clean with the front bumper off, a new oil filter and fresh oil, replaced coolant and a cooling system that had been vacuum filled rather than topped up. The coolant hoses at the housing were inspected and recommended during the same access, and the lower oxygen sensor was noted as a component worth replacing while the front of the car was open. The eight-hour figure quoted to the owner reflected the teardown the repair actually requires, not the size of the gasket.
Customer Feedback
The owner sourced their own parts for the job, confirmed what they had bought, and asked directly what the labour would come to before the appointment was set. Their questions were about scheduling around work rather than about the repair itself; a Friday afternoon drop-off was arranged, with a ride home offered so the car could stay at the shop. The photographs taken during teardown were kept for exactly this kind of conversation, so the answer to "why does a simple gasket cost this much" can be shown rather than argued.
Photos From This Repair
Other Considerations
This section is general guidance for anyone taking this job on themselves. It is not a record of findings on this particular car — where a step below was not part of this repair, it is offered as what a careful version of the job looks like.
Prove the leak before buying parts. Visible oil near the oil filter housing does not prove the housing gasket is the source. Identify the fluid, degrease the whole area, then run the engine and watch for the first point that becomes wet. Oil travels down and backwards with airflow, so the lowest wet point is usually not the leak. A mirror, inspection camera or UV dye makes a slow leak findable instead of a guess.
Know every seal that can leak here before blaming the gasket.
- Housing-to-engine gasket — the classic external oil leak
- Oil cooler seals, where the cooler mounts to the housing — can leak oil, coolant or both
- Oil filter cap O-ring — flattened, hardened, doubled up, or sitting against the cap flange instead of in its groove
- Cracked plastic filter cap, usually from over-tightening or the wrong tool
- Cracked or warped housing, from over-tightening, uneven bolt torque, corrosion or prying
- A nearby oil pressure switch or sensor, which can make the housing look guilty
- A leak from above — valve cover, vacuum pump, VANOS-area seals — running down onto the housing
- Migration along front-cover casting seams
Gasket or complete housing. A new gasket is the right repair when the housing is confirmed flat, uncracked and serviceable. Replace the whole assembly when the housing is cracked, the cap threads are damaged, the sealing face is warped or badly corroded, a bolt boss is cracked, a previous repair buried it in sealant, or it is leaking from more than one place. Decide after the housing is off and inspected, not from the parts counter.
Control the fluids. The housing carries oil and coolant, so plan for both: cold engine, cooling system depressurised, enough coolant drained to stop it running everywhere, separate pans, the oil filter out before the housing where that helps, open ports capped, and the drive belt and alternator protected. Oil or coolant on the belt causes noise, slip and later failure. Never let coolant, old gasket material, grit or solvent into an oil passage.
Take it apart without breaking it. Photograph hose and harness routing before disconnecting anything, note bolt lengths and locations, and confirm every fastener is out before the housing moves — a hidden bolt or an attached bracket makes it feel seized. Do not pry against aluminium sealing faces. Front-end plastics, clips and coolant hose fittings on a car of this age are brittle, so budget for replacing something you did not plan to.
Inspect what came off. Check the housing for cracks, warping, corrosion, damaged threads and old sealant, and the engine face for leftover gasket material, scratches, pitting and debris near the oil passages. Read the old gasket: flattening, hardening, missing material and oil or coolant tracks across the sealing face tell you whether it really was the leak path. Clean with plastic or non-damaging tools — aggressive abrasives remove metal and leave grit behind.
Assemble onto a clean, dry, flat surface. That is the whole repair. Bring the housing squarely up to the engine; do not use the bolts to pull a misaligned housing into place, and check the gasket has not shifted and no wire or hose is trapped. Skip RTV unless the procedure specifically calls for it. Fit a new cap O-ring in its correct groove, lightly oiled, and never run the cap up with an impact tool. Use the torque values and tightening sequence from current MINI service information for your exact engine — published guesses strip aluminium threads and distort housings.
Refill and bleed properly. Vacuum filling is the reliable way to get air out of these cooling systems. Otherwise follow the MINI bleed procedure exactly, confirm circulation and cabin heat, watch the temperature, and recheck the level once the engine has cooled. Trapped air produces intermittent overheating, weak heat and gurgling — and it is routinely mistaken for a leaking new housing.
Validate under real conditions. Check for leaks at cold start, warm idle, moderate engine speed, full operating temperature and right after shutdown, then road test while watching temperature, warning lights, burning-oil smell, heater output and belt noise. Afterwards, put it back in the air and look at the housing from above and below, at the subframe and transmission for fresh fluid, and recheck oil and coolant. Clean off the remaining old residue so the next inspection means something, and recheck after a heat cycle or two — old trapped oil can keep dripping and look like a failed repair.
Remember what a new housing cannot fix. If the real source is the valve cover, vacuum pump, front cover or a pressure switch above the housing, replacing the housing changes nothing except the bill.
Questions About This Repair
Why does an oil filter housing gasket take around eight hours on a MINI Cooper?
The housing sits at the front of the engine behind the bumper and cooling pack, and it is both an oil and a coolant joint. Getting to it well enough to clean and verify the sealing surface means removing the front bumper and moving the cooling pack, then refilling oil and coolant afterwards. Eight hours is quoted so there is room if a brittle clip, a seized fastener or a hose that should not go back on extends the job.
Can the oil filter housing gasket be replaced without removing the front bumper?
People do it that way, but you cannot properly see or reach the sealing surface with the bumper in place. Removing the bumper is how the surface is confirmed clean, and a surface that is not verified clean is how the leak comes back.
What else should be replaced while the oil filter housing is off?
The coolant hoses that run to the oil filter housing, because they are only accessible with everything already apart. On a turbocharged car the turbo oil feed and oil return lines are worth doing at the same time. The lower oxygen sensor is also easier to reach at this point, so replacing it here avoids paying separate labour for it later.
Does the oil and coolant have to be changed during this repair?
Yes. The housing is both an oil and a coolant joint, so the engine oil and filter come out as part of the job and coolant is lost when the housing is removed. Both are replaced rather than reused.
How do you confirm the oil filter housing is actually the source of the leak?
Degrease the whole area first, then run the engine and watch for the first point that becomes wet, using a mirror, inspection camera or UV dye if the leak is slow. Oil runs downwards and backwards, so the lowest wet spot is usually not the source. Leaks from the valve cover, vacuum pump, VANOS-area seals or an oil pressure sensor above the housing can all make the housing look guilty, and replacing it would not fix any of them.
Does the whole oil filter housing need replacing, or just the gasket?
That is decided after the housing is off and inspected. A new gasket is correct when the housing is flat, uncracked and serviceable. The complete assembly is justified when the housing is cracked or warped, the cap threads are damaged, a bolt boss is cracked, a previous repair left heavy sealant, or it is leaking in more than one place.
Why vacuum fill the cooling system instead of just topping it off?
Vacuum filling pulls the air out before the coolant goes in, so no pocket of air is left behind. Trapped air causes false temperature readings, poor heater output and localised hot spots, all of which look like a new problem after an otherwise good repair.
Repairs Like This One
- 7 documented Engine repairs. See them all →
- 5 documented Cooling repairs. See them all →